Answer
Aug 16, 2023 - 08:10 AM
IMPORTANT: Remember that your pool is compatible with chlorine and shock as normal. If your pool is experiencing temporary loss of chlorine or other difficulties, add sanitizer as needed to maintain the pool.
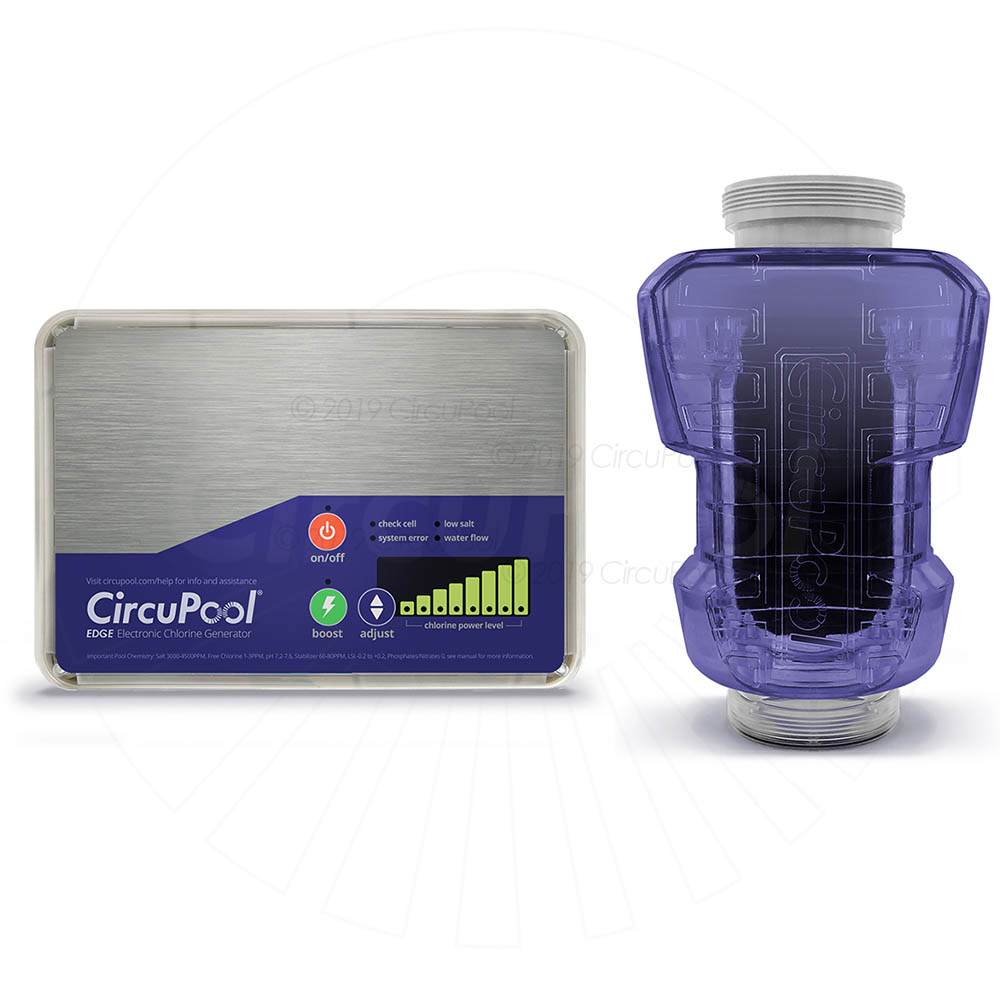
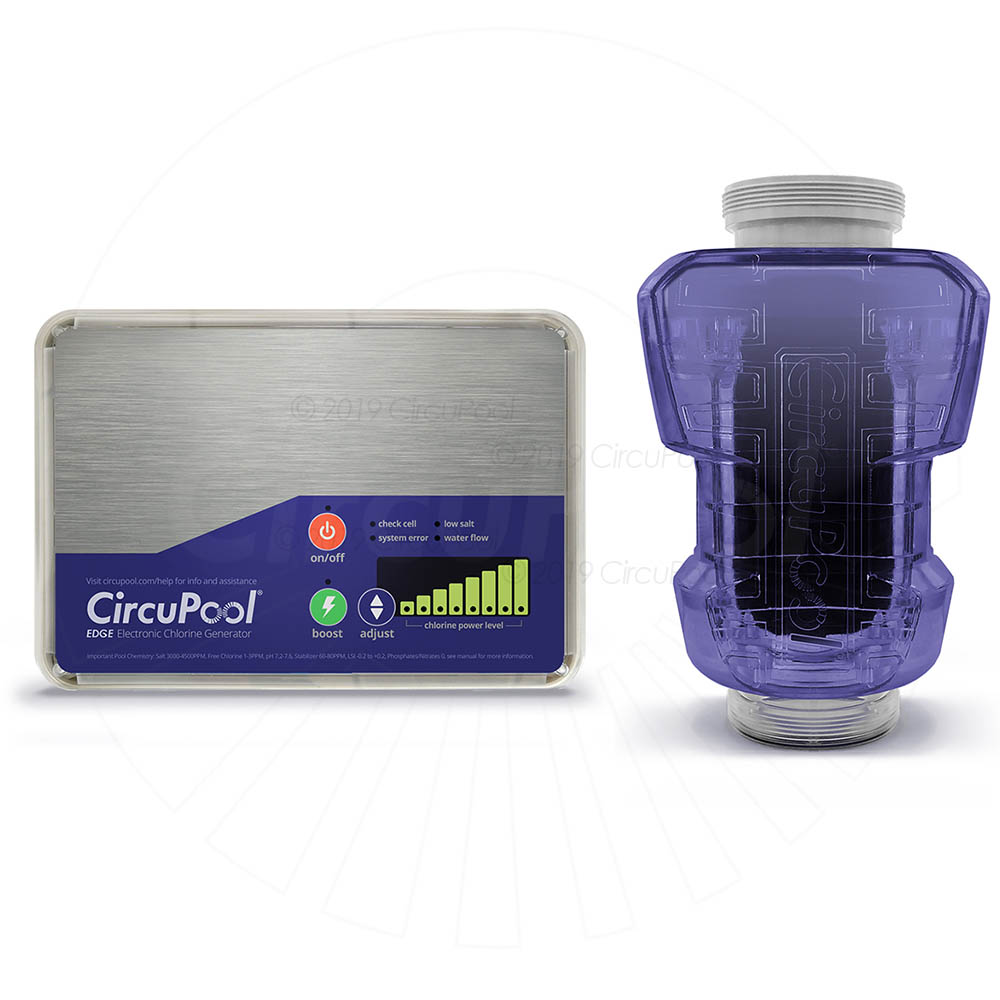
Check Cell (Solid) – Error Light
When this LED is illuminated, the cell may need to be cleaned.
Troubleshooting:
- Double check the pool’s salinity level. Independently measure salt level and adjust to 3500-4000ppm if needed.
- If the salinity level independently tests in range, the cell needs to be cleaned to remove mineral scaling or other debris. Clean the cell according to the instructions below. Inspect the cell after cleaning to make sure nothing is stuck between the plates. Sometimes multiple cleanings in a row are required; mix a new batch of cleaning solution and let it soak inside the cell. If “fizzing” still occurs, repeat the cleaning process with new solution each time until fizzing no longer occurs when new solution has been added to the cell.
- If the salt level is ideal and the cell has been thoroughly cleaned multiple times in a row, the cell plates may be depleted or damaged and the cell has reached the end of its useable lifespan. If damaged, inspect the cell for plates that are damaged, deteriorated, pitted or physically worn. If so, this indicates corrosive water chemistry (low LSI) that needs to be prevented through regularly ensuring proper water balance.
- Additional Troubleshooting:
- Is the pool losing prime and/or is low-speed pump operation causing air to accumulate in the Cell?
- Has the salt system been run without any pump operation? If the cell has a white milky coating and is no longer clear, the Flow Sensor should also be checked for failure.
- Has a new Cell been installed after replacing a depleted Cell? Allow the system to run for at least 45 minutes and the “check cell” LED should go off.
Check Cell (Flashing) – Error Light
This LED may flash when the cell is nearing the end of its lifepsan.
Troubleshooting:
No troubleshooting is required. The Cell can continue to be used until a solid warnling light occurs, but enough operation has occurred that you should consider purchasing a replacement cell. The flashing LED light can be cleared by following the follow the Reprogramming instructions below.
How To Clean The Cell
IMPORTANT: Using gloves and eye protection during this process is recommended. Always add acid to the water, never water to the acid. Always work in a well-ventilated area. Splashing or spilling acid can cause severe personal injury and/or property damage. The Electrolytic Cell has the self-cleaning Reverse Polarity feature built-in, which prevents mineral deposits from forming rapidly. However, the Cell may eventually need to be manually cleaned. The frequency of mineral build-up is dependent upon the balance of the pool's water chemistry, specifically the Saturation Index.
In most circumstances, the Check Cell LED indicator will be illuminated solidly when the cell needs to be cleaned. Do not insert metal or any hard objects inside the cell during cleaning, this will void the warranty. Follow these steps to clean the cell:
- Turn all power to the filter system and salt system off. Close return line valves if applicable. Completely disconnect the Cell Cord from the Control Module. Unscrew the two threaded collars at the inlet and outlet side of the cell, then remove the cell from the return line.
- Remove the o-ring on the “smaller” end of the cell.
- Attach the Cleaning Cap (included with system at original purchase) to the other side of the cell (the “wider” end), then orient the cell vertically with the Cap on bottom.
- In a separate bucket, mix a solution of one part Muriatic Acid and five parts water, and pour the solution into the top of the cell.
- Secure cell and let it soak until all mineral scaling has been dissolved.
- You will notice a fizzing or fogging effect inside the cell once the solution has made contact with the titanium cell, this is normal. The solution should completely cover the titanium plates, and should usually be allowed to soak for 10 minutes.
- Depending on the amount of scaling, a cell may need to be cleaned multiple times in a row. The cleaning solution may stop fizzing because the acidity of the cleaning solution has been neutralized by the amount of mineral scale, not because all of the scale has been removed.
- Safely dispose of the solution by pouring it into the pool.
- Flush out any remaining debris from the cell with a hose.
- Put the o-ring back in place and re-install the cell in the pool plumbing.
Control Module Reprogramming
When installing a new cell of the same size – or – clearing the flashing Check Cell LED:
This procedure will reset the system’s internal count of production hours. This should be done in order to clear the Check Cell light when flashing and any time a new cell (of the same size) is installed.
- Press the On/Off switch to deactivate the Control Module. (Leaving power on at power source)
- Hold down the chlorine Adjust button until the LED’s on the chlorine output power graph light up. Take note of how many LED’s are displayed: 1 LED (EDGE15), 4 LEDs (EDGE25), or 8 LEDs (EDGE40).
- Tap the Adjust button once, then let the Control Module sit until the lights turn off.
- Hold down the Adjust button until the LED’s light back up on the chlorine output power graph.
- Tap the Adjust button twice (confirm that the same number of LED’s are lit up as on Step #2 above), let the Control Module sit until the lights turn off, then hit On/Off button to turn unit back ON.
- Turn off power at the power source (breaker, timer, etc…) for about 30 seconds.
- Turn power back on at the power source.
- Allow the salt system and pump to run for at least 5 minutes to calibrate before shutting it off again.
When installing a new cell of a different size:
If a different size cell is to be used (ex: upgrading to a new Cell of a larger size), the Control Module needs to be set in order to work correctly with the new Cell size. Follow these instructions to change the Control Module to the correct Cell Type.- Press the On/Off switch to deactivate the Control Module. (Leaving power on at power source)
- Hold down the chlorine Adjust button until the LED’s on the chlorine output power graph light up.
- Press the chlorine Adjust button to set the Control Module to a EDGE15 (1 LED light displayed), EDGE25 (4 LED lights displayed), or EDGE40 (8 LED lights displayed).
- Once desired size is chosen, let the Control Module sit until the lights turn off, then hit On/Off button to turn unit back ON.
- Turn off power at the power source (breaker, timer, etc…) for about 30 seconds.
- Turn power back on at the power source.
- Allow the salt system and pump to run for at least 5 minutes to calibrate before shutting it off again.
WARNING: Always make sure that input power is completely disconnected before attempting service or troubleshooting procedures. All troubleshooting procedures should be done by a qualified professional.
IMPORTANT: Remember that your pool is compatible with chlorine and shock as normal. If your pool is experiencing temporary loss of chlorine or other difficulties, add sanitizer as needed to maintain the pool.


Add New Comment